
How to Photograph Cards for a Valuation

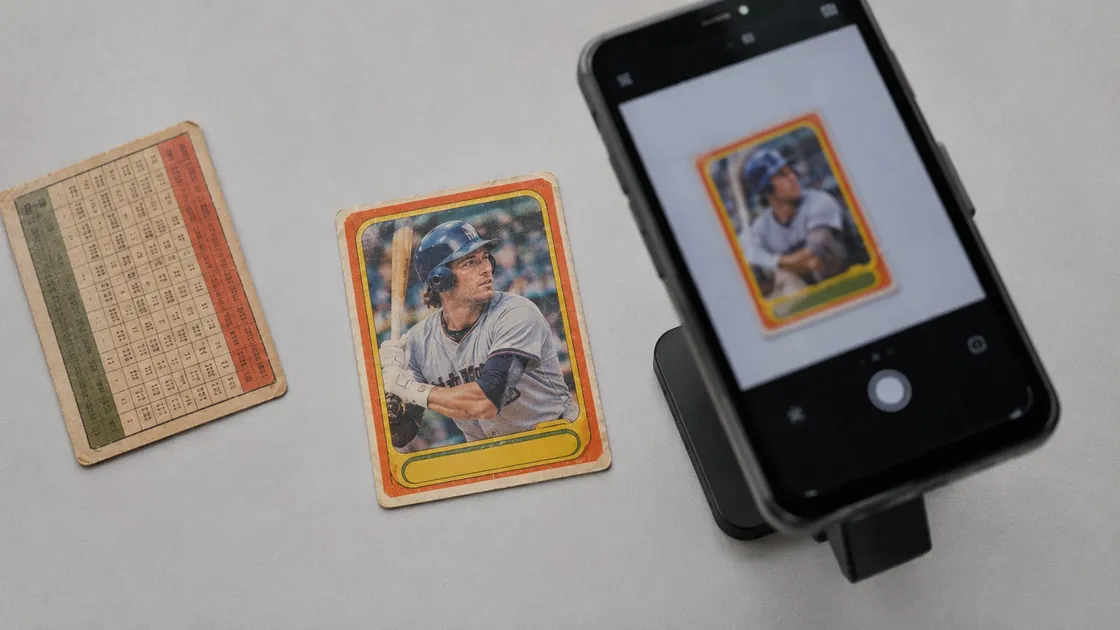
The single most useful thing you can do before asking anyone what your cards are worth is take a few decent photos. Not a hundred. Not a catalog. Six or so, done right.
I look at a lot of collection photos, and the difference between a photo I can give an honest read from and one I can’t almost never comes down to the camera. It comes down to light and angle. A phone held straight over a card next to a window beats an expensive camera with the flash on, every time.
Here’s what to shoot, and how. When you fill in the valuation form, I reply by email, and you can send the photos straight back in that reply. There’s no upload step to wrestle with.
| Photo | What it tells me |
|---|---|
| 1. Everything, as found | How big it is, how it was kept, what era it leans toward |
| 2. A typical handful, spread out | What most of the collection actually is |
| 3. Fronts of the best cards | Who’s on them, and their rough condition |
| 4. Backs of a few | The year, the set, whether it’s original |
| 5. Any graded slabs | The grade and certification, if the label is readable |
| 6. One angled close-up | The surface: creases, wear, gloss |
1. Everything, exactly as you found it
Before you move anything, step back and photograph the whole lot: the boxes, binders, shoeboxes, the stack in the closet. If it’s spread across several boxes, get them all in one frame if you can, then a shot looking down into each one.
This photo does more work than people expect. How cards were stored says a lot about how they were treated. A neat run of binder pages, a tin of rubber-banded stacks, and a damp garage box all tell different stories. It also stops you from doing the one thing that costs collections money, which is sorting them before anyone who knows cards has looked. Don’t spend an evening organizing. The photo of the mess is more useful than the tidy version.
2. A handful of what most of it is
Take a typical stack from the middle of a box (not the best cards, just whatever’s there) and spread fifteen or twenty out on a table so they don’t overlap. Shoot straight down.
This is the photo that tells me what most of the collection actually is. In nearly every box, a few cards carry most of the value and the rest is the bulk around them. I need to see the bulk to know what it’s worth, and to see whether the oldest cards are the exception or the rule.
3. The fronts of the best cards
Now the fun part. Pull out anything that looks oldest, any player names you recognize, anything that just looks different. Lay them out in rows on a plain surface (a dark tablecloth or a sheet of poster board works well) and photograph them straight on, close enough that the cards fill most of the frame.
Don’t worry about getting every card. Ten or twenty of the best is plenty for a first read. If one looks like it might matter, I’ll ask for a closer look at that card specifically.
4. The backs of a few
Flip over a handful of the oldest-looking ones and photograph the backs. The back is where a card’s year usually lives, either in the copyright line or in the statistics, and it takes about ten seconds to read once you know where to look.
It’s also where problems show. Reprints tend to say so in small print on the back, and the card stock often looks wrong in a way that’s easier to spot there than on the front. You don’t need the back of everything, just the cards you’d most like to know about.
5. Any graded slabs
If the collection includes cards sealed in hard plastic holders with a printed label, photograph each one so the whole label is sharp and readable. The label carries the grade, the grading company and a certification number, and the grade on it is often the biggest single factor in what that card is worth.
Never open a slab to get a better photo. The sealed holder is the point.
6. One close-up, at an angle, in window light
This is the photo most people skip, and it’s the one that catches what the others miss.
Take your best card, hold it near a window in daylight, and tilt it slowly until the light rakes across the surface. Creases, surface wear, wrinkles and loss of gloss are nearly invisible in a flat, straight-on photo and suddenly obvious at the right angle. Photograph it at that angle.
A crease you can't see straight on can be the difference between a $500 card and a $50 one.
That’s not a reason to worry. It’s a reason to know before you sell, so that nobody, including me, can surprise you with it later.
Light: the thing that actually matters
Turn the flash off. A phone flash fires straight at the card, bounces off the gloss and lays a white glare right across the middle of the photo, which is exactly where you’d see a crease or a stain. It hides the information a valuation depends on.
Daylight from a window is the best light you have, and it’s free. Overcast days are even better than bright sun, because the light is softer and doesn’t throw hard shadows. Avoid overhead room lights if you can. They tend to throw your own shadow across the card and tint everything yellow.
The bottom line
Six photos, window light, straight down, no flash, nothing cleaned or sorted first. That’s enough for an honest first read on almost any collection, from a single shoebox to a garage full of boxes.
If you want a sense of what you might be looking at before you send anything, the card values page shows what cards from each era have actually sold for, and what I buy shows whether yours are the kind I’m after. When you’re ready, fill in the form, and when I reply, send the photos back in that email. I’ll take it from there.
Key takeaways
- Six photos are enough for a first read on almost any collection, even a big one.
- Shoot the collection as you found it before touching it. The boxes and how they were kept tell a buyer a lot.
- Daylight from a window, no flash. Flash glare hides exactly the creases and surface wear that matter.
- Fronts sell the card; backs date it. Send a few of each.
- Don't clean, sort or take cards out of tight holders just for the photos.
Frequently asked questions
- Do I need a good camera to photograph cards for a valuation?
- No. Any phone from the last several years is plenty. What matters is the light and the angle: shoot straight down from above, near a window in daylight, with the flash off. A sharp, evenly lit phone photo is more useful than a professional one with glare across the card.
- How many photos does a large collection need?
- For a first read, not many. A wide shot of everything, a few shots of representative stacks, and close-ups of the cards that look oldest or most interesting will tell me what's there. If something needs a closer look, I'll ask for it specifically rather than having you photograph every card.
- Should I take my cards out of their sleeves or holders for photos?
- Leave graded slabs sealed, always. Cards in loose penny sleeves can come out if they slide out easily, which cuts glare, but don't force a card out of a tight top-loader or screw-down holder just for a photo. Tilt the holder slightly away from the window instead to move the reflection off the card.
- Should I photograph the backs of my baseball cards?
- For a handful of them, yes. The back usually tells me the year and confirms which set a card is from, and on older cards it's where reprints tend to give themselves away. You don't need the back of every card, just the oldest-looking ones and anything you're unsure about.